
What Videola does
A walk through the editor. Everything on this page is finished and tested — what is still planned is in the architecture chapter.
The editing surface
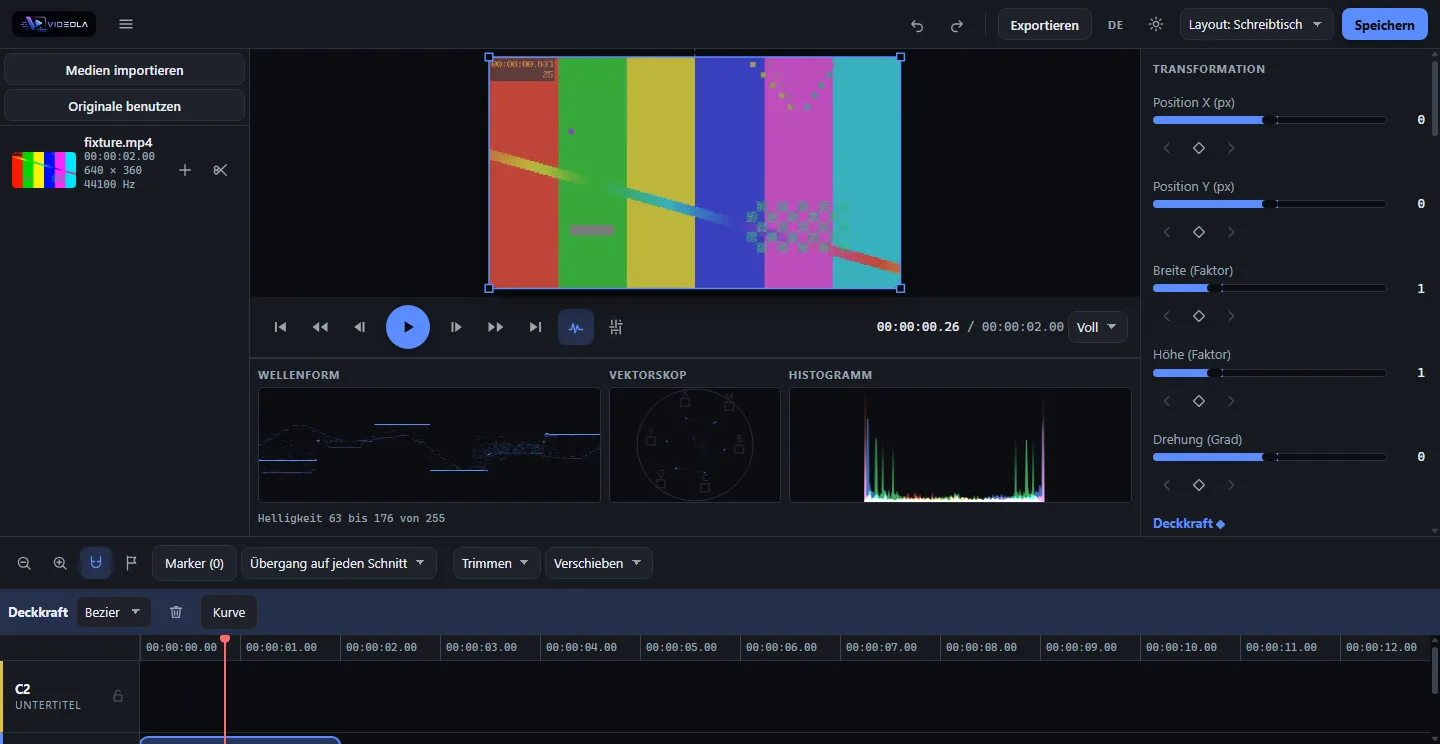
Four zones, and the picture is the largest of them — a check holds that, because a grid row that grows with its contents had twice shrunk the canvas to a stamp before anyone noticed.
The library lists what the project holds, each medium with its length, its size in pixels and its sample rate, and a thumbnail decoded from the file itself. The properties panel shows what is adjustable about the selected clip and lets any parameter be animated. The timeline is where the work happens. The mixer carries one strip per track plus a master; it and the measuring instruments are opened from the transport and start folded away, because the picture is the largest zone on the screen and neither of them is worth giving that up unasked.
Video, sound and pictures are all media here. A PNG, JPEG, WebP, GIF, BMP or AVIF lands in the library like anything else, takes five seconds on the timeline because a picture has no length to read off it, and goes through the compositor and the export exactly as footage does — which is what a watermark, a title card and an end card are made of.
Cutting
| Gesture | Result |
|---|---|
| Click a clip | selects it; hold a modifier to select more |
| Drag the middle | moves it, across tracks too |
| Drag an edge | trims, ripples or rolls, depending on the edge mode |
| Drag with the move mode on slip or slide | slips the source under the clip, or slides the clip between its neighbours |
| Drag in the ruler | scrubs |
| Drag over empty timeline | a rubber band over everything it touches |
| Two pointers | zoom by the change in distance |
| Long press | opens the context menu |
A clip can be switched off rather than deleted: it keeps its place and its length, nothing draws it and nothing plays it, and it is drawn dimmed and hatched. That is how two takes are compared — deleting one and pasting it back is a different operation, and it loses where the clip was.
A drag over empty timeline draws a rubber band and selects what it touches; dragged shut it gives the selection back.
Find the cuts in this clip reads every frame of a clip and splits it where the picture changes far more than it did around it — a card off a camera, cut into its takes in one undo step. A dissolve is not reported as a cut, and neither is a pan: the test is a spike against its own neighbourhood rather than a threshold. See Editing.
Ripple delete closes the gap it leaves. Groups move together. Cut, copy and paste work on whole clips, markers sit on the ruler, and a selection can be folded into a compound clip — that the picture does not change when you do is proven against the whole frame buffer, the draw list at sixteen instants and the audio render sample for sample. Give that compound an opacity, a blend, an effect, a crop or a dissolve and it is composited onto a surface of its own first, so all five meet the finished group once: two overlapping clips faded to half read 128 across the overlap, not the 191 that used to draw a seam through them.
Everything runs through Pointer Events, so mouse, pen and finger take the same path, and a whole drag — two hundred pointer moves — is one undo step.
The classical cut is here too: mark a range in a medium with I and O, then , inserts it at the playhead — opening the same gap on every track, so sound stays with picture — or . overwrites with it, replacing what was there and leaving the timeline the length it was. Each is one command, so an insert across three tracks and a dozen clips is one Ctrl+Z.
An adjustment track carries no picture of its own: its clips' effects run over everything drawn below them — over the composed picture, once, not once per clip — so five shots are graded at once instead of five times. That the picture underneath changes and the picture beside it does not is checked on real pixels, because that is the only place the claim exists; and so is the seam, where two clips meeting under a blurred layer keep their colours adding up to a whole 255 instead of 194.
Markers carry a colour and a note, and the list beside the marker button jumps between them — Shift and an arrow key does the same from the keyboard.
Effects, transitions and text
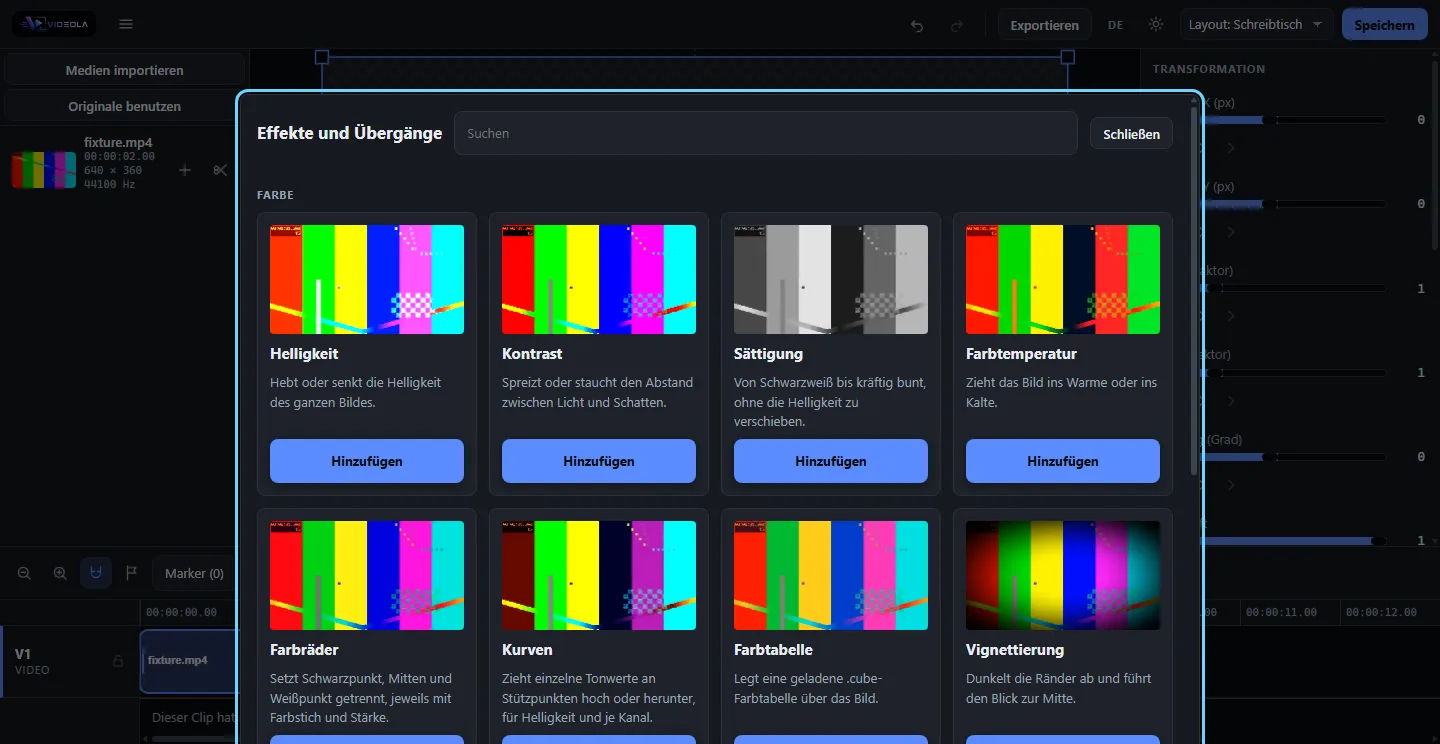
They are picked from a browser grouped by category and searchable in both languages, and every tile is the effect's own shader over the frame at the playhead — not a painted illustration. A tile that failed to change the picture it was drawn from fails the build, which is what stops an effect from advertising itself with its own default value.
Brightness, contrast, saturation, colour temperature, curves, colour wheels, lookup tables, vignette, blur, sharpen, mosaic, directional blur, glow and chroma key. Cross dissolve, wipe, slide, iris, zoom, blur dissolve and dip-to-colour. Rectangular and elliptical masks with feather and invert; two masks in one chain intersect. A text generator with styling and in, out and loop animation.
Motion blur is not one of them, deliberately: a clip carries a shutter and the renderer averages it over eight real instants of that exposure, each with its own source time and its own placement. No shader can produce that from one picture, which is why the directional blur above is named for what it is. See Effects and transitions.
An effect can be switched off without being removed, and removed without being switched off: bypass keeps every parameter and keyframe in place. Until this version there was no command for either.
Every parameter can be keyframed — including a clip's position, scale, rotation and opacity — and a position track turns a series of keys into a motion path interpolated as a curve rather than a set of corners. The interpolation happens in the Rust core, so the preview and the export cannot read different values.
Keyframes are edited on a lane under the tracks, on the timeline's own axis: press one to pick it, drag it to move it, Delete or the button above the lane to remove it, and a picker for what times the stretch after it — linear, hold, ease or a curve of your own. One drag is one undo step, and it all works with a finger as well as with a mouse.
Record mode — the round button in the transport — turns every setting into a key at the playhead, on fields nobody armed by hand and on a drag across the picture alike, and says so with a purple border around the window.
The curve field opens beside the picked keyframe, over the tracks, and shows the one segment that starts at it: the travel plotted against the even-paced diagonal, with a handle on each end to drag. The line is sampled from the core's own easing rather than redrawn here, so what is on screen is what moves the picture — a curve that looked like one thing and animated like another is the one fault such a tool must not have. The three presets stay a single click beside it. A rate track is never offered a curve: the area under a bezier is not exact, and the time mapping a speed ramp is made of rests on that area being exactly additive. See Editing.
Each effect's behaviour is measured against real pixels rendered by a real driver: 338 such checks run on every build, and every tile in the browser is one of them — a tile that failed to change the picture it was drawn from fails the build. A third-covered pixel over red must read 81, which is what premultiplied alpha gives; the reflex answer of 255 fails.
Colour correction, and something to judge it by
Curves and colour wheels, and three measuring instruments to read the result on.
Curves on brightness and on each of the three channels, with control points you drag: tap the field to add one where you tapped, tap a point to take it away, and the two ends stay. The line is a monotone cubic, which cannot overshoot between two points — an overshoot on a tone curve is a bright rim along every edge in the picture that crossed that tone. The brightness curve is not the three channel curves in step: it scales all three by one ratio, so the colour of a pixel comes out exactly as it went in and only its brightness moves.
Colour wheels — lift, gamma and gain — each with a tint and a strength, which is what the wheel and the ring on a real panel are. Lift says where black goes, gain says where white goes, and gamma bends what lies between without moving either end.
Lookup tables: drop a .cube on the editor and pick it under the grade. The table joins the library like any other medium — content-addressed, so the same file imported into two projects is one file on disk, and packed into the .videola, so a project that travels brings its grade with it. A strength slider mixes the look back towards the picture it came from. The table is read against the picture as it stands, which is the right input for a display-referred look; a table authored for linear light expects its own input and will not be told otherwise. A one-dimensional .cube is refused by name, because that is a tone curve and the curves above already edit one with points you can drag afterwards.
Scopes: a waveform, a vectorscope and a histogram, in a strip under the picture that a switch on the transport opens. They read the preview's own pixels, so what they show is what the export will write. They are shrunk on the GPU before they are counted and measured ten times a second: 0.9 ms a reading rather than the 33 ms a naive full-frame count costs at 1080p, and nothing at all while the strip is closed.
Everything here is keyframable like any other parameter, curves included — a curve keyframe interpolates its control points, so a knee slides sideways as well as up.
Subtitles
An SRT or a WebVTT dropped on the editor becomes a caption track: one clip per cue, at the cue's own instants. The same track writes back out as an SRT, character for character -- the formats count in whole milliseconds, a millisecond is exactly 705 600 flicks, and the conversion lives in one place so a file can make the round trip without moving.
A subtitle is a clip with a text generator in it, so it drags, trims and splits like anything else on the timeline; merging one into the next is a menu entry and a single undo step. The words are typed in the inspector, in a textarea rather than a one-line field, because a two-line subtitle is two lines. The default look is white on a translucent plate, low and centred, and that it stays readable on a bright sky and on a night interior is checked at pixels rather than asserted.
In the export they go into the picture, beside it as a subtitle track the viewer can switch off, or nowhere. Which containers can carry a track of their own is asked of the writer rather than assumed, and the file that comes out is read back by ffprobe to confirm the track is really in it.
Caption clips are refused nowhere and marked everywhere: only a caption track is written back out, so the lower thirds on your text tracks stay out of the subtitle file.
Retiming and presets
A clip's speed is a curve over time, not a factor. Keyframes on the speed track make the map from project time to source time an integral rather than a multiplication — the area under the rate curve — and consumed_source is that same integral asked for the whole clip, so a total and a prefix of it can never disagree. Reversal, trimming and the decoder clamp all keep working because they were built on that one function rather than on the arithmetic it replaced.
The sound follows the same curve: an AudioBufferSourceNode reads its buffer at the running integral of playbackRate, so the picture and the sound are one mapping computed by two engines, not two implementations that have to be kept in step. A ramp is checked flick for flick against the Rust core across seven shapes, and sample for sample in a real offline audio render.
A frame hold is a rate of zero and nothing else. No still-image clip, no second kind of source.
The presets — a frame hold, three slow-motion shapes, a Ken Burns push, picture in picture, a split screen — are lists of commands sent under one coalesce key, not entries in the project file. That makes each of them one press of undo without a line of inversion code, and reachable from an agent by sending the same commands. See Editing.
Subtitles
A subtitle is a clip with a text generator on a caption track — its own track kind, because only that can answer "which of these clips are subtitles". A lower third sits on a text track and would otherwise be written into every SRT.
SRT and WebVTT go in and come out. A millisecond is exactly 705 600 flicks, so the round trip is lossless by arithmetic rather than by rounding luck — and it is checked byte for byte, twice: once through the parser alone, once through the real Rust core and a save-and-reopen. The test times are deliberately none of them a whole second, a tenth, or a frame at any rate on offer.
Captions can be retyped, split and merged on the timeline like any clip. They render into the picture through the same text generator the templates use, and the export can carry them as a track where the container allows it.
Sound
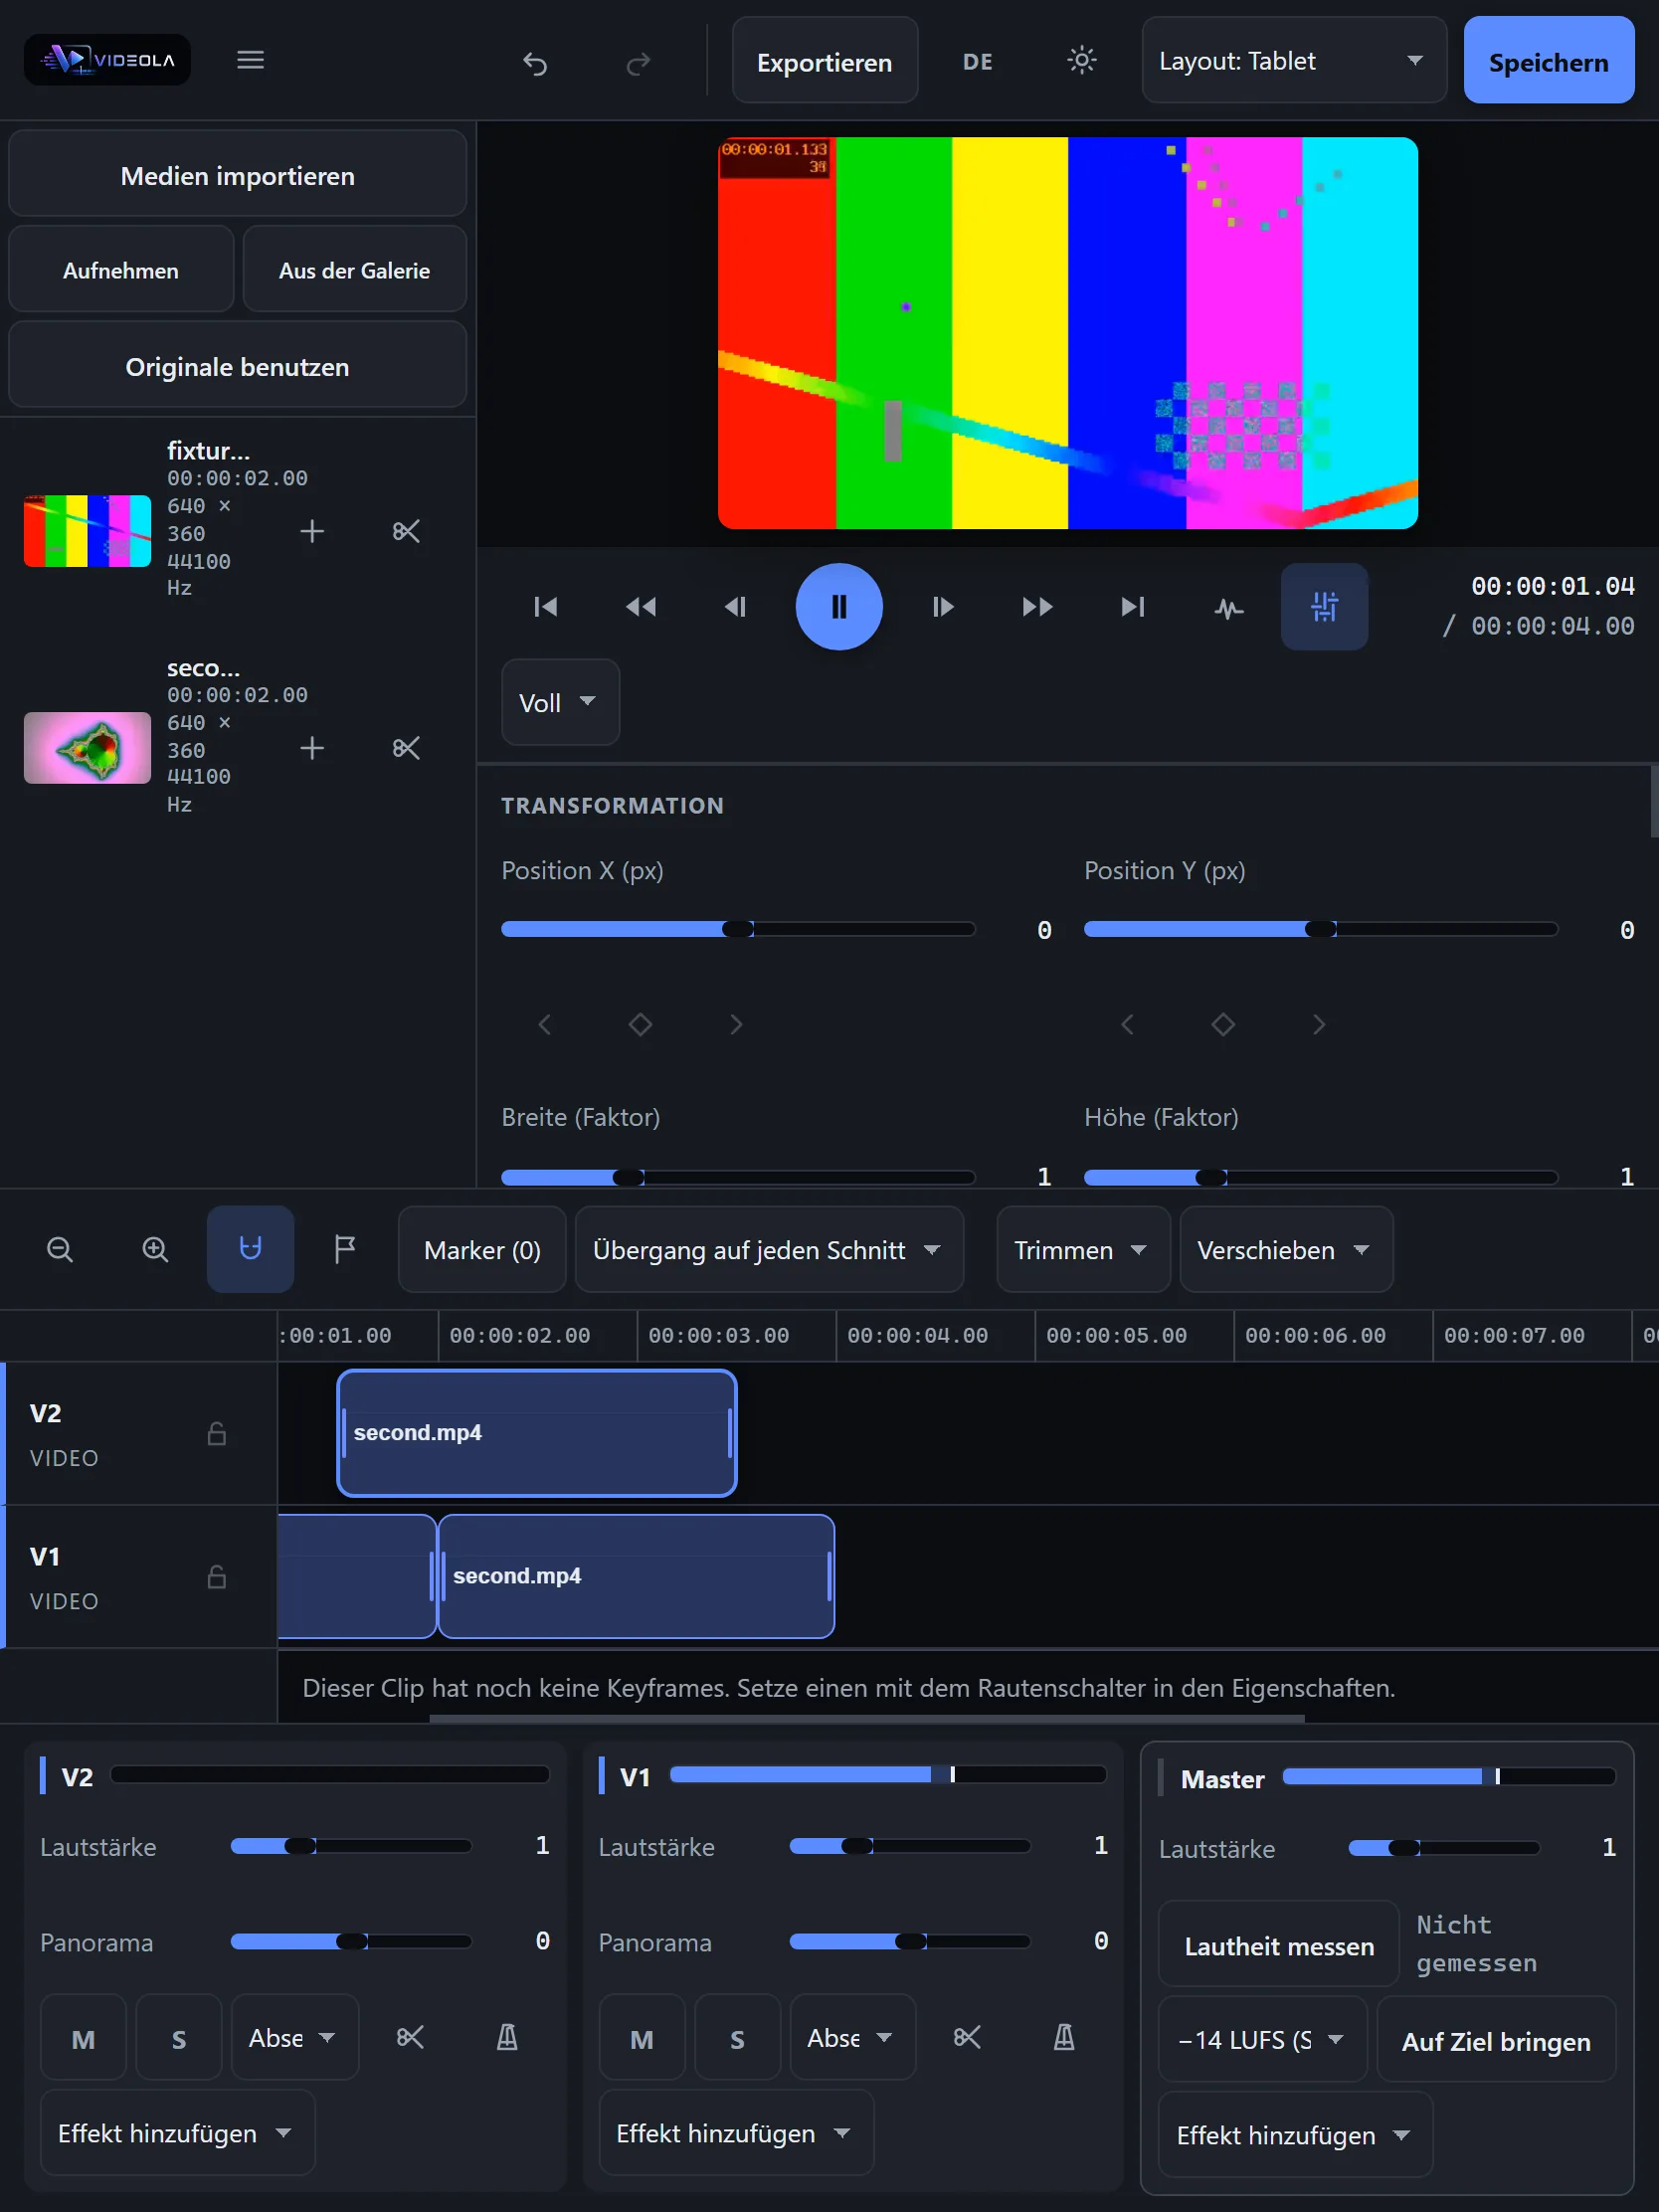
Per-track volume, pan, mute and solo, with mute winning over solo. Fades are scheduled as automation rather than computed per frame, which is the difference between a clean fade and a click. Waveforms are drawn from the buffers the graph already decoded — no second decode, and a reversed clip shows itself the way it plays.
Each track and the master can carry inserts: a peaking EQ, a compressor, a limiter. They sit ahead of the fader, console-style, so the fader rides the levelled signal. Their parameters are keyframable like any other, and the same resolver serves the preview, the export, the server and the loudness meter.
Stereo or 5.1, chosen on the master strip. In a surround project every track has a position in the field rather than a place between two speakers: pan left to right, rear front to back, and an LFE send that is a band — a low-pass at the 120 Hz the specification for that channel names — rather than a place. Placement is pairwise and constant-power between adjacent speakers, so a sweep keeps its loudness; a stereo bed keeps the width it was recorded with, and a bed panned inwards reaches the centre speaker. A 5.1 mix the browser cannot encode is delivered in stereo with its placement kept, rather than in silence.
Noise reduction is spectral, and it is the one thing the low and high cut cannot be: it separates a voice from noise sharing its band. The floor is learned from the pauses in the clip itself, and each window is turned down per bin by however much of it is floor. It runs over the decoded buffer rather than as an insert, because the analysis needs the whole recording — so the waveform strip visibly changes when it is switched on, which is the same buffer the preview and the export use.
Loudness is measured to EBU R128 and verified against the Tech 3341 conformance cases. The limiter's knob is called threshold, not ceiling: the browser's compressor applies its own makeup gain, so it is not a brickwall, and the documentation says so rather than implying otherwise.
Every strip carries a level meter — peak, effective value and a falling hold marker, read from an analyser that sits in the signal path rather than beside it. Normalising moves the master fader onto a target of −14, −16 or −23 LUFS and then measures again, so what is reported is a reading and not the target. Ducking pulls the music down under a voice track by writing keyframes onto a gain insert on the music bus — visible corners you can drag afterwards, not an invisible automatic, and the only choice the Web Audio API leaves open since it has no sidechain. Cutting silence finds the pauses in a track from the peaks already on screen and takes them out, leaving a gap rather than rippling the picture out of sync. See Audio.
Playback and export
The audio clock leads and the picture follows, because audio drift is audible and a dropped frame is not. Frame rates stay rational to the last division — 30000/1001 is not 29.97, and a frame step built from the decimal drifts off the ruler within a few hundred frames.
J, K and L shuttle backwards, halt and shuttle forwards, stepping up through 1, 2, 4 and 8 with each press in the same direction. That rate belongs to the transport and not to the material: a clip's own speed, ramp and all, is untouched by it and reaches the export as it was authored. The preview can be drawn at half or a quarter resolution, which is the cheapest performance there is on a large project and never reaches the exported file.
Material taller than 720 pixels gets a proxy: a 720p H.264 copy with a key frame every second, made once in a worker of its own and kept in OPFS beside the original under the original's content hash. The preview decodes the proxy; the export decodes the original. A decoded frame costs width × height × 4 bytes whatever the file was compressed to, so the same 256 MiB frame cache holds 8 frames of 4K and 72 at 720p — which is the difference between a scrub that finds its frames in memory and one that decodes a whole group of pictures for every step back. A medium whose proxy is missing works exactly as it did before there were proxies, and Use originals in the library switches the preview back to the material at any time.
Export writes MP4 with H.264 and AAC, or WebM with VP9 and Opus, in a worker, through the same compositor the preview uses. Progress is reported and cancelling really stops it. A browser that can encode a format's picture but not its sound writes a silent file rather than failing halfway — Chrome on Linux is exactly that browser.
Every export in CI is handed to ffprobe and ffmpeg, which share no code with this project, and the decoded result is compared frame by frame against what went in.
Material from a link
Import media opens one dialogue with both ways in. On the left, files from this computer — dropped on it or chosen. On the right, a link or a search: paste a YouTube address, or type what you remember of the title and pick from the results, with thumbnails, the channel and the running time. Then the type, the codec, the format and the quality, the way MeTube asks them, and it downloads with a progress bar. What arrives is an ordinary medium in the library: hashed into storage, probed, ready for a track.
It needs a server of your own with yt-dlp on it, because a page may not read another origin's video — and it is for material you hold the rights to. A link is resolved before it is fetched and refused if it points into the server's own network.
Templates
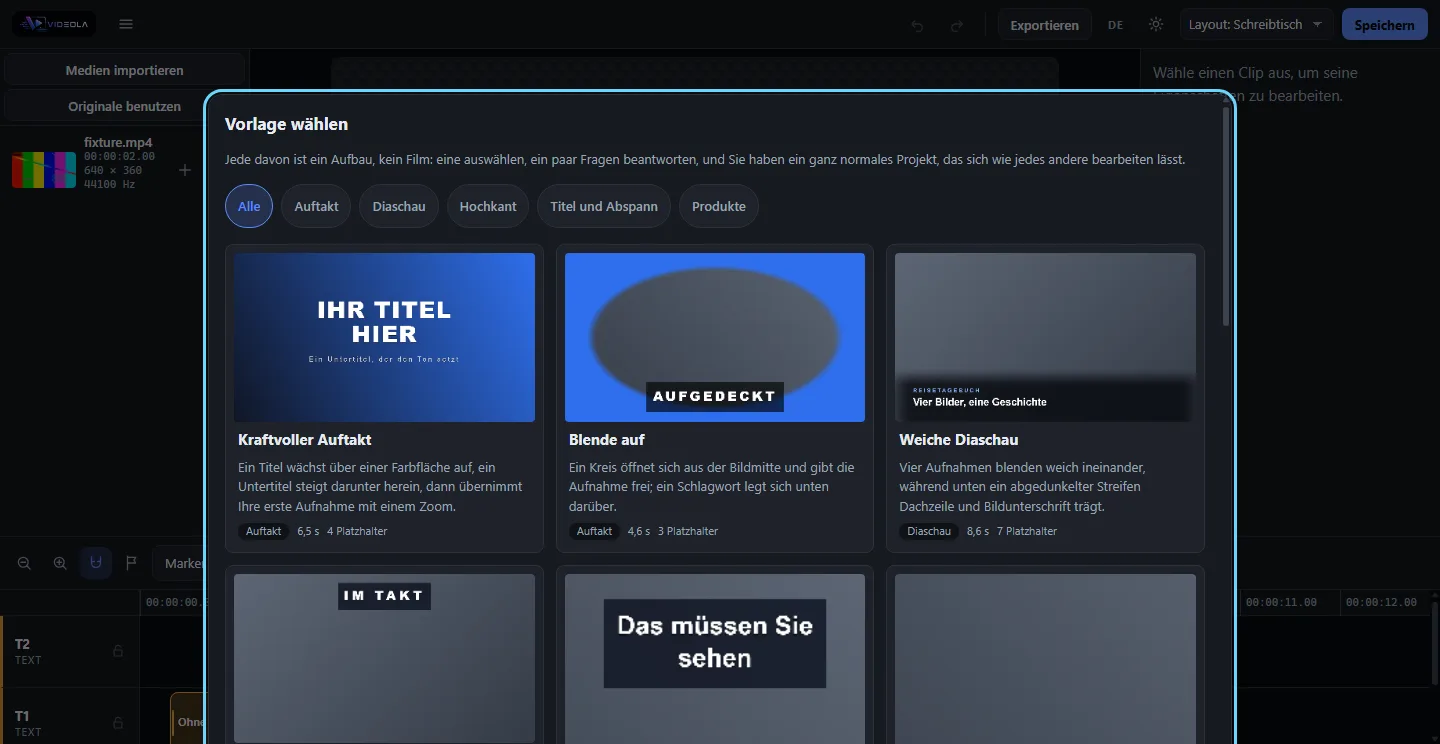
A template is the same container as a project with one extra entry, so the same bytes still open as a project. Pick one, answer the wizard, and what you get is an ordinary editable project — there is no template mode to leave.
Thirteen ship, in five categories, and not one of them carries a frame of video. A template is a recipe, so each is built out of what the renderer can draw from a project file alone: the text generator with its entry, exit and loop moves, solids and gradients, the countdown, the thirteen effects the five transitions, masks, and keyframed transforms including a motion path. Your own material arrives through the placeholders. Between them they use every transition the renderer implements.
The card is not a painting of a result — it is rendered from the template, through the same bake a real answer goes through, with a grey stand-in exactly where your footage will land. A painted card could show a look the renderer would never produce, and nobody would find out until after they had chosen. Costs one small picture per template, drawn one at a time while the gallery is already open; a preview project holds nothing but generators, so there is no decoding and no storage to read.
Keys
Help ▸ Keyboard shortcuts has a sheet of them, and every row on it is a key the editor really answers — shortcut in Timeline.tsx, useTransportKeys in Transport.tsx and commandKey in useCommandKeys.ts are the whole roster, and a sheet listing a key nobody handles would send somebody looking for a fault in their keyboard.
| Key | What it does |
|---|---|
| Space | play or pause, from anywhere outside a text field |
| J K L | shuttle back, halt, shuttle forward |
| ← → | one frame back or forward |
| Shift + ← → | to the previous or next marker |
| Del | delete the selection, leaving a gap |
| Shift + Del | delete it and close the gap |
| Ctrl/Cmd + C X V | copy, cut, paste at the playhead |
| Ctrl/Cmd + G | group; with Shift, ungroup |
| N | fold the selection into one clip |
| M | drop a marker at the playhead |
| S | cut at the playhead |
| Ctrl/Cmd + A D | select every clip; duplicate the selection |
| Ctrl/Cmd + Z S O E | undo, save, open, export — with Shift on Z, redo |
| + - 0 | zoom in, zoom out, fit the whole edit in the window |
| Home End | to the start or the end of the edit |
The modifier is written as Ctrl/Cmd rather than resolved per platform, because a browser cannot ask which one this keyboard has: navigator.platform guesses from the operating system, which is wrong on a Mac with a PC keyboard and on Linux either way.
The project keys — undo, redo, save, open, export — listen on the window and answer wherever the focus is, except in a field, whose own Ctrl/Cmd+Z is left alone. The editing and view keys need the timeline to have the focus. N and M carry no modifier for a reason worth knowing: every Ctrl/Cmd combination near them is taken by the browser itself, and a shortcut the browser eats is a shortcut that does not exist.
Which layout, and who decides
Under 768 px is a phone, under 1280 a tablet, and wider than that a desktop — but only if the browser reports a fine pointer. (any-pointer: fine) is the only honest question a page can ask about what is being pointed with, and it is answered wrongly often enough to matter: a wide screen with no mouse attached gets the tablet layout, which is right for a drawing tablet and wrong for a desktop whose mouse the browser cannot see. The setting beside the theme switch says which layout is in force and lets it be pinned; the choice is remembered.
It cost three failing checks to find. The application harness was measuring a two-column tablet grid on a 1440 px window and reporting, correctly, that the picture was 216 px tall — a true statement about a layout nobody meant to check. Every run now pins the layout it names.
On a phone
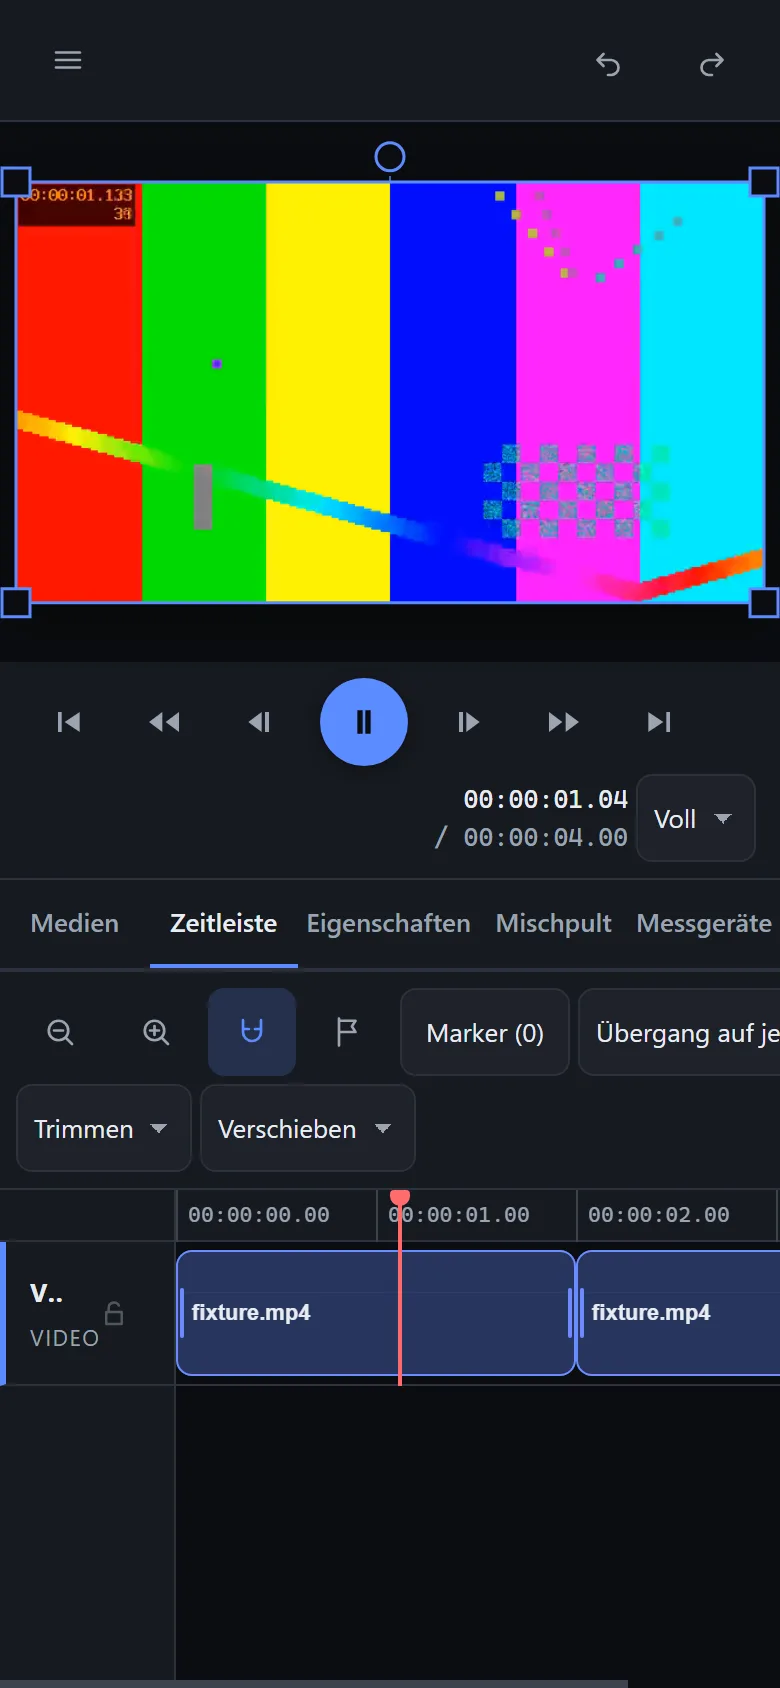
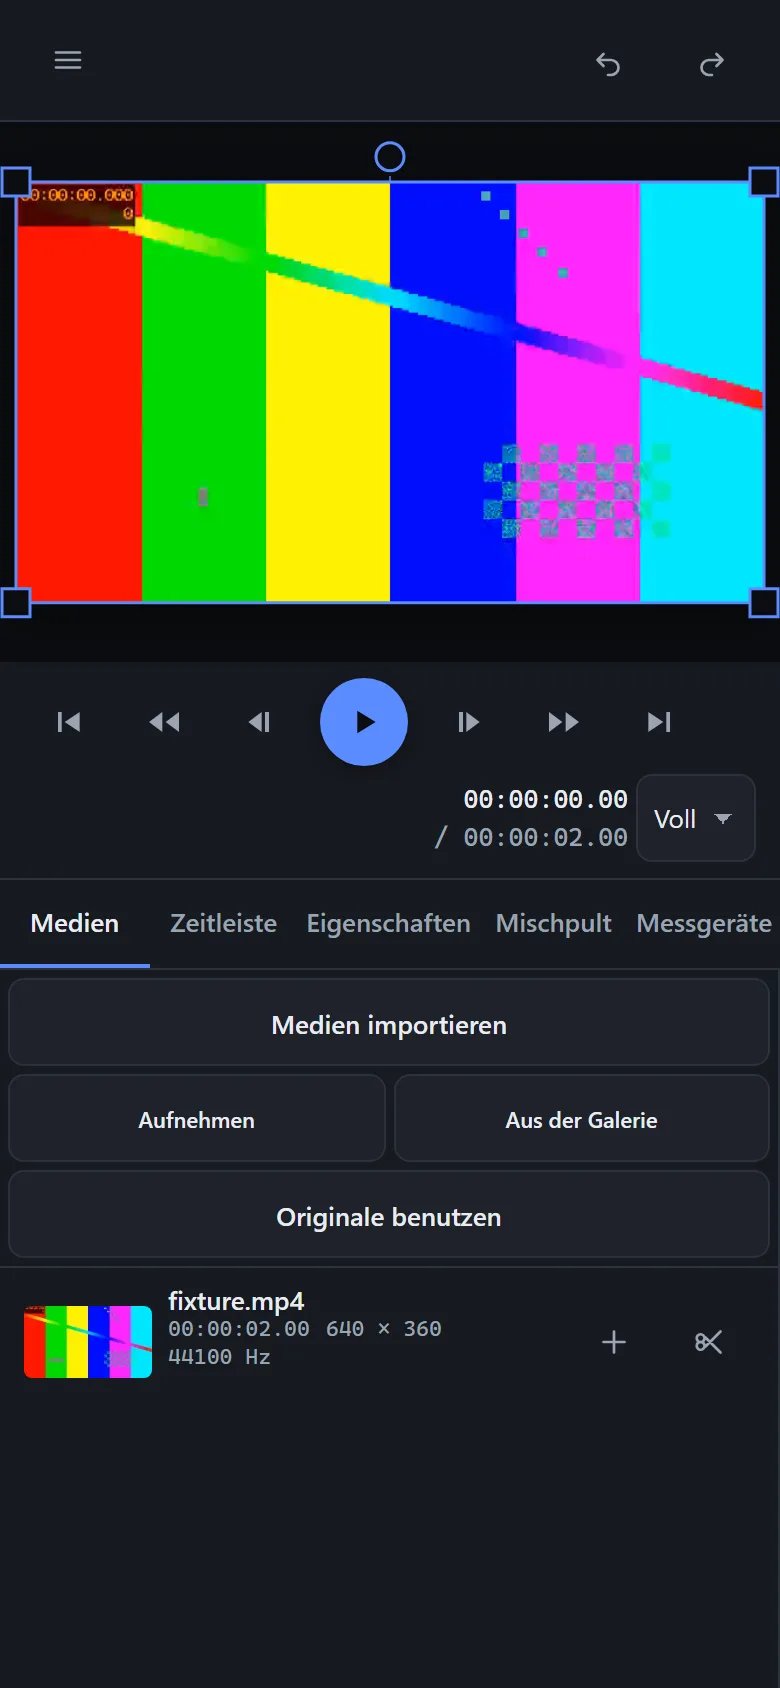
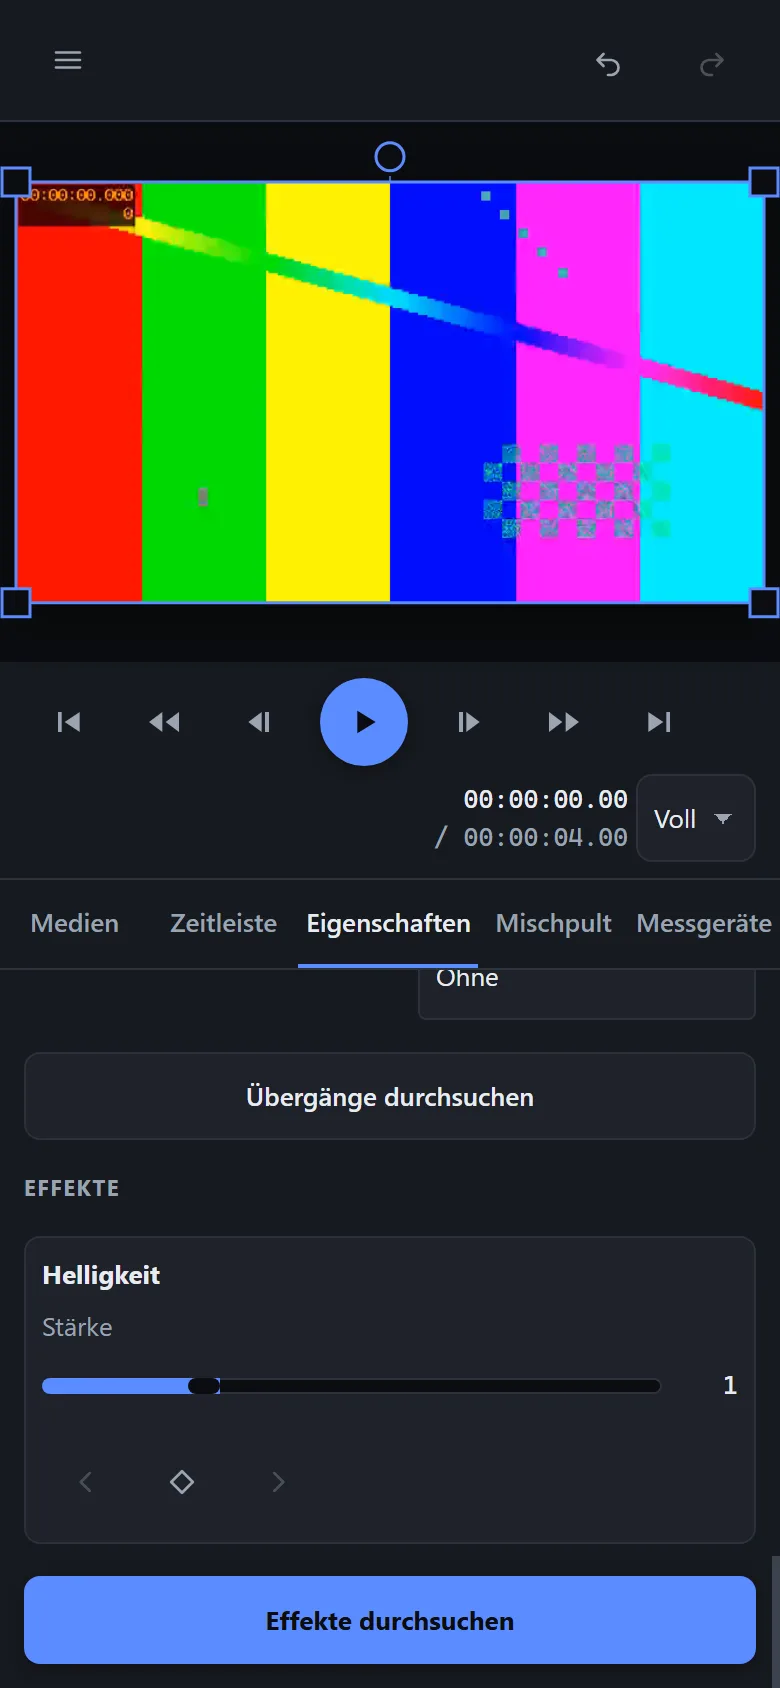
Below 768 px the editor becomes one column: the picture and the transport stay at the top, and a tab bar swaps between media, timeline and properties. The panel that is not showing is unmounted rather than hidden — the timeline windows its clips by the width it measures, and a display: none container measures zero.
Nothing else changes. The same pointer path carries a finger, hit areas grow to 44 px when the pointer is not a mouse, and every action reachable on a desktop is reachable here. Import can come from the camera or the gallery.
The phone layout is driven at a real 390×844 viewport at twice the pixel density over the devtools protocol, because Chrome on Windows refuses a window narrower than 500 CSS pixels — --window-size alone would have measured a small tablet and called it a phone.
For agents and scripts
The whole command catalogue is exposed over HTTP, to AI agents over MCP, and on the command line. The catalogue is generated from the Rust enum, so a new command becomes an agent capability without anyone editing a list.
An agent can also look at what it did: project_getFrame renders a still at any instant and project_getAudioPeaks returns the mixed waveform. The still comes out of the same core, draw list and compositor the editor draws with, so it cannot show something the editor would not.
See The API and MCP.
Self-hosting
One Node process serves the editor, the HTTP API, the MCP server and the CLI. It refuses to start on a public address without a token and says why. See Building and releasing.